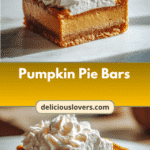
Irresistible Pumpkin Pie Bars That Steal the Show
The air is crisp, the leaves are a riot of color, and my kitchen is once again filled with the comforting aroma of autumn spices. There’s something truly magical about this time of year when the world seems to slow down just enough to savor the small joys. Today, we’re diving into one of my favorite autumn treats—Pumpkin Pie Bars. These delightful bars capture the essence of a classic pumpkin pie but with a twist that’s perfect for sharing with friends over a hot cup of tea. Growing up in Devon, my mum taught me that the kitchen is a place for creating memories, and these bars are a delicious chapter in that story.
Table of Contents
Why You’ll Love This Pumpkin Pie Bars
If you’ve ever found yourself torn between the desire for a cozy dessert and the convenience of a handheld treat, this recipe is your answer. These Pumpkin Pie Bars are a delightful hybrid that brings together the creamy, spiced goodness of pumpkin pie with the ease of a bar. Perfect for gatherings or a quiet evening at home, these bars evoke a sense of nostalgia, much like the cinnamon-dusted crumbles from my mum’s kitchen. They are a testament to how food can be both comforting and exciting, a reflection of the past and a step into the future of flavors.
Ingredients You’ll Need for This Pumpkin Pie Bars

- 1 1/2 cups all-purpose flour
- 1/2 cup granulated sugar
- 1/2 cup packed light brown sugar
- 1/2 cup unsalted butter, melted
- 1 teaspoon ground cinnamon
- 1 teaspoon baking powder
- 1/4 teaspoon salt
- 1 1/2 cups pumpkin puree
- 1/2 cup evaporated milk
- 2 large eggs
- 1 teaspoon vanilla extract
- 1/2 teaspoon ground ginger
- 1/4 teaspoon ground nutmeg
Nutrition Facts
- Calories: 230 per serving
- Protein: 3g
- Fat: 10g
- Carbohydrates: 33g
- Fiber: 2g
- Sugar: 18g
- Sodium: 110mg

Irresistible Pumpkin Pie Bars That Steal the Show
Learn how to make delicious Pumpkin Pie Bars. Easy recipe with step-by-step instructions.
- Total Time: 45 minutes
- Yield: 4 servings 1x
Ingredients
- 1 1/2 cups all-purpose flour
- 1/2 cup granulated sugar
- 1/2 cup packed light brown sugar
- 1/2 cup unsalted butter, melted
- 1 teaspoon ground cinnamon
- 1 teaspoon baking powder
- 1/4 teaspoon salt
- 1 1/2 cups pumpkin puree
- 1/2 cup evaporated milk
- 2 large eggs
- 1 teaspoon vanilla extract
- 1/2 teaspoon ground ginger
- 1/4 teaspoon ground nutmeg
Instructions
- Preheat your oven to 350°F (175°C) and line an 8×8-inch baking pan with parchment paper, leaving an overhang on the sides for easy removal.
- In a medium bowl, combine the flour, granulated sugar, brown sugar, and melted butter. Mix until crumbly. Press half of the mixture into the bottom of the prepared pan to form the crust.
- Bake the crust for 10 minutes until just set. Remove from the oven and let it cool slightly while you prepare the filling.
- In a large bowl, whisk together the pumpkin puree, evaporated milk, eggs, vanilla extract, cinnamon, ginger, and nutmeg until smooth and well combined.
- Pour the pumpkin mixture over the baked crust, spreading it evenly with a spatula.
- Sprinkle the remaining crumb mixture over the top of the pumpkin layer.
- Return the pan to the oven and bake for 35-40 minutes, or until the filling is set and the topping is golden brown.
- Allow the bars to cool in the pan for at least 30 minutes before using the parchment overhang to lift them out. Slice into squares and serve.
- Prep Time: 15 minutes
- Cook Time: 30 minutes
- Category: Main Dish
- Method: Cooking
- Cuisine: International
Steps to Create Your Pumpkin Pie Bars
- Preheat your oven to 350°F (175°C) and line an 8×8-inch baking pan with parchment paper, leaving an overhang on the sides for easy removal.
- In a medium bowl, combine the flour, granulated sugar, brown sugar, and melted butter. Mix until crumbly. Press half of the mixture into the bottom of the prepared pan to form the crust.
- Bake the crust for 10 minutes until just set. Remove from the oven and let it cool slightly while you prepare the filling.
- In a large bowl, whisk together the pumpkin puree, evaporated milk, eggs, vanilla extract, cinnamon, ginger, and nutmeg until smooth and well combined.
- Pour the pumpkin mixture over the baked crust, spreading it evenly with a spatula.
- Sprinkle the remaining crumb mixture over the top of the pumpkin layer.
- Return the pan to the oven and bake for 35-40 minutes, or until the filling is set and the topping is golden brown.
- Allow the bars to cool in the pan for at least 30 minutes before using the parchment overhang to lift them out. Slice into squares and serve.
Tips for Making the Best Pumpkin Pie Bars
One of the joys of baking is experimenting, so don’t hesitate to put your spin on these bars. If you’re feeling adventurous, toss in a handful of chopped pecans or walnuts into the crumb topping for added texture. Remember, the key to a perfect crust is ensuring it’s just set before adding the pumpkin filling—this prevents a soggy bottom, as my mum would always say with a wink. And if you’re out of evaporated milk, a mix of milk and cream can work in a pinch, bringing an extra layer of richness to the bars.
Serving Suggestions and Pairings

These Pumpkin Pie Bars are delightful on their own, but if you’re looking to elevate the experience, consider serving them with a dollop of freshly whipped cream or a scoop of vanilla ice cream. For a touch of elegance, sprinkle a hint of cinnamon on top. And if you’re like me, a warm mug of chai or a glass of spiced apple cider makes for a perfect pairing, turning a simple dessert into a truly comforting ritual. Learn more: Irresistible Pumpkin Snickerdoodle Bars You Need to Try Today
Storage and Reheating Tips
To keep these bars fresh, store them in an airtight container in the refrigerator for up to five days. If you’re planning to enjoy them warm, simply reheat them in a preheated oven at 300°F (150°C) for about 10 minutes, or until they’re warmed through. They also freeze well, making them an excellent make-ahead treat when the holiday season gets busy. Just wrap individual bars in plastic wrap and store them in a freezer-safe bag for up to three months.
Frequently Asked Questions
What are the main ingredients for Pumpkin Pie Bars?
The main ingredients for Pumpkin Pie Bars include the items listed in our ingredients section above. Each ingredient plays a crucial role in achieving the perfect flavor and texture.
How long does it take to make Pumpkin Pie Bars?
The total time to make Pumpkin Pie Bars includes both preparation and cooking time. Check the recipe card above for exact timing details.
Can I make Pumpkin Pie Bars ahead of time?
Yes, Pumpkin Pie Bars can often be prepared in advance. Store it properly in an airtight container in the refrigerator and consume within the recommended timeframe.
What can I serve with Pumpkin Pie Bars?
Pumpkin Pie Bars pairs well with various sides and accompaniments. Consider the serving suggestions mentioned in the recipe for the best dining experience.
Is Pumpkin Pie Bars suitable for special diets?
Depending on the ingredients used, Pumpkin Pie Bars may be adapted for various dietary needs. Check the ingredients list and consider substitutions as needed for your dietary requirements.
Final Thoughts
As we gather around the table, sharing stories and laughter, these Pumpkin Pie Bars become more than just a dessert—they are a reminder of the warmth and connection that food brings into our lives. Just as my childhood home was filled with the scents and stories of my mum’s baking, I hope these bars bring a touch of that same magic to your kitchen. Here’s to creating new memories, one delicious bite at a time.